
 ArtFiberFest Inchie Group Swap organized by Marylin Nouvelle (mine is the center one in the 2nd row with the bird. I’ve posted a picture near the bottom of this tutorial)
Hello, my tutorial is for anyone who wants to make a inchie out of fabric, quilt style, meaning it has 3 layers like a quilt. I have really simplified this tutorial, just to teach you the basic steps. By all means, feel free to expand on my tutorial- especially when it comes to the embellishment phase.
I have also provided directions for people who use standup quilting systems, as well as anyone who uses their home sewing machine. Have fun!- Carla
Carla’s Inchie Tutorial
Inchies are one inch quilts consisting of 3 primary layers- the backing, the middle layer and the top. They are fast and fun to do! You may also make Double Inchies- 2” x 2” and Inchies Plus -1.5” x 1.5” sizes for people who find the one inch size too confining.
Step 1: Gather your supplies for the following layers based on your desired color palette:
Backing: Fat Quarter sized fabric for the backing in a fabric that will go well with your chosen color palette. (If you are making multiple inchies in various color palatte, then choose a larger backing in a color that works for your particular color palette.)
Middle Layer: Chose heavy weight pellon or my favorite is 2mm Fun Foam (found at any craft store). Please note that I do not recommend Fast2Fuse, Timtex and similar products with adhesive. The adhesive layer has a tendency to attach to the sewing or quilting machine needle and “gunk it up.”
Top Layer: Will need fabric scraps, including a focal scrap fabric in your desired color, embellishments (such as buttons, beads, ribbons, lace, charms, words, heat set cystals, photo transfers, etc.), also paint or any other embellishment technique that you know. I also suggest Steam-a-Seam Light 2 for any fusible bonding needs. (this product does not gunk your machine up).
Also need basic sewing supplies such as matching thread, decorative thread, scissors, needle, sewing machine, rotary cutter, ruler, cutting mat, etc.
Step 2: Layer the bottom 2 layers to create your design surface– Lay out on your flat working surface your backing material (wrong side up), then lay over this your craft foam or heavy weight pellon (this product is a similar thickness to Timtex, Fast2Fuse without the adhesive layer). This will be your working design surface.

[Note to Mid or Longarm owners: Load your backing fabric on your bottom and top rollers, then place your middle layer on top of this. This is now your working design surface.]
Step 3: Create your visual top design in a collage fashion. You will be working in an area determined by how many inchies you need to make. (For instance, if you needed 25- 1” inchies, you would be working in a space 5 inches by 5 inches.) Keep in mind that anything placed down will need to be soft enough to stitch through. Harder embellishments such as charms, beads, etc. can be added later. Don’t forget to add some elements to your piece that are interesting.
 *Helpful Hint- I used my hot iron to flatten the layers before stitching!
[for mid and longarm owners- you can also load a larger backing, then create many sets of inchies all at once! It is much easier to create your multiple designs on a longarm than on your home machine at this point.]
Step 4: Once you are happy with your design, then you can start stitching them down in place. If you find that your top layers are moving or shifting, then by all means use the lightweight fusible mentioned above for added control (following the directions on the Steam-a-Seam Lite 2) then fuse it together with your iron before the stitching step. Another alternative would be to lay a piece of fine netting or similar material over your work surface to prevent catching the small pieces with your machine foot. You could use a water soluble layer, as well, but I’m too lazy to wash it out. LOL! Now stitch everything in place, then add some more stitching for added texture and color. Remember, you can always change thread colors, too, or use specialty threads.
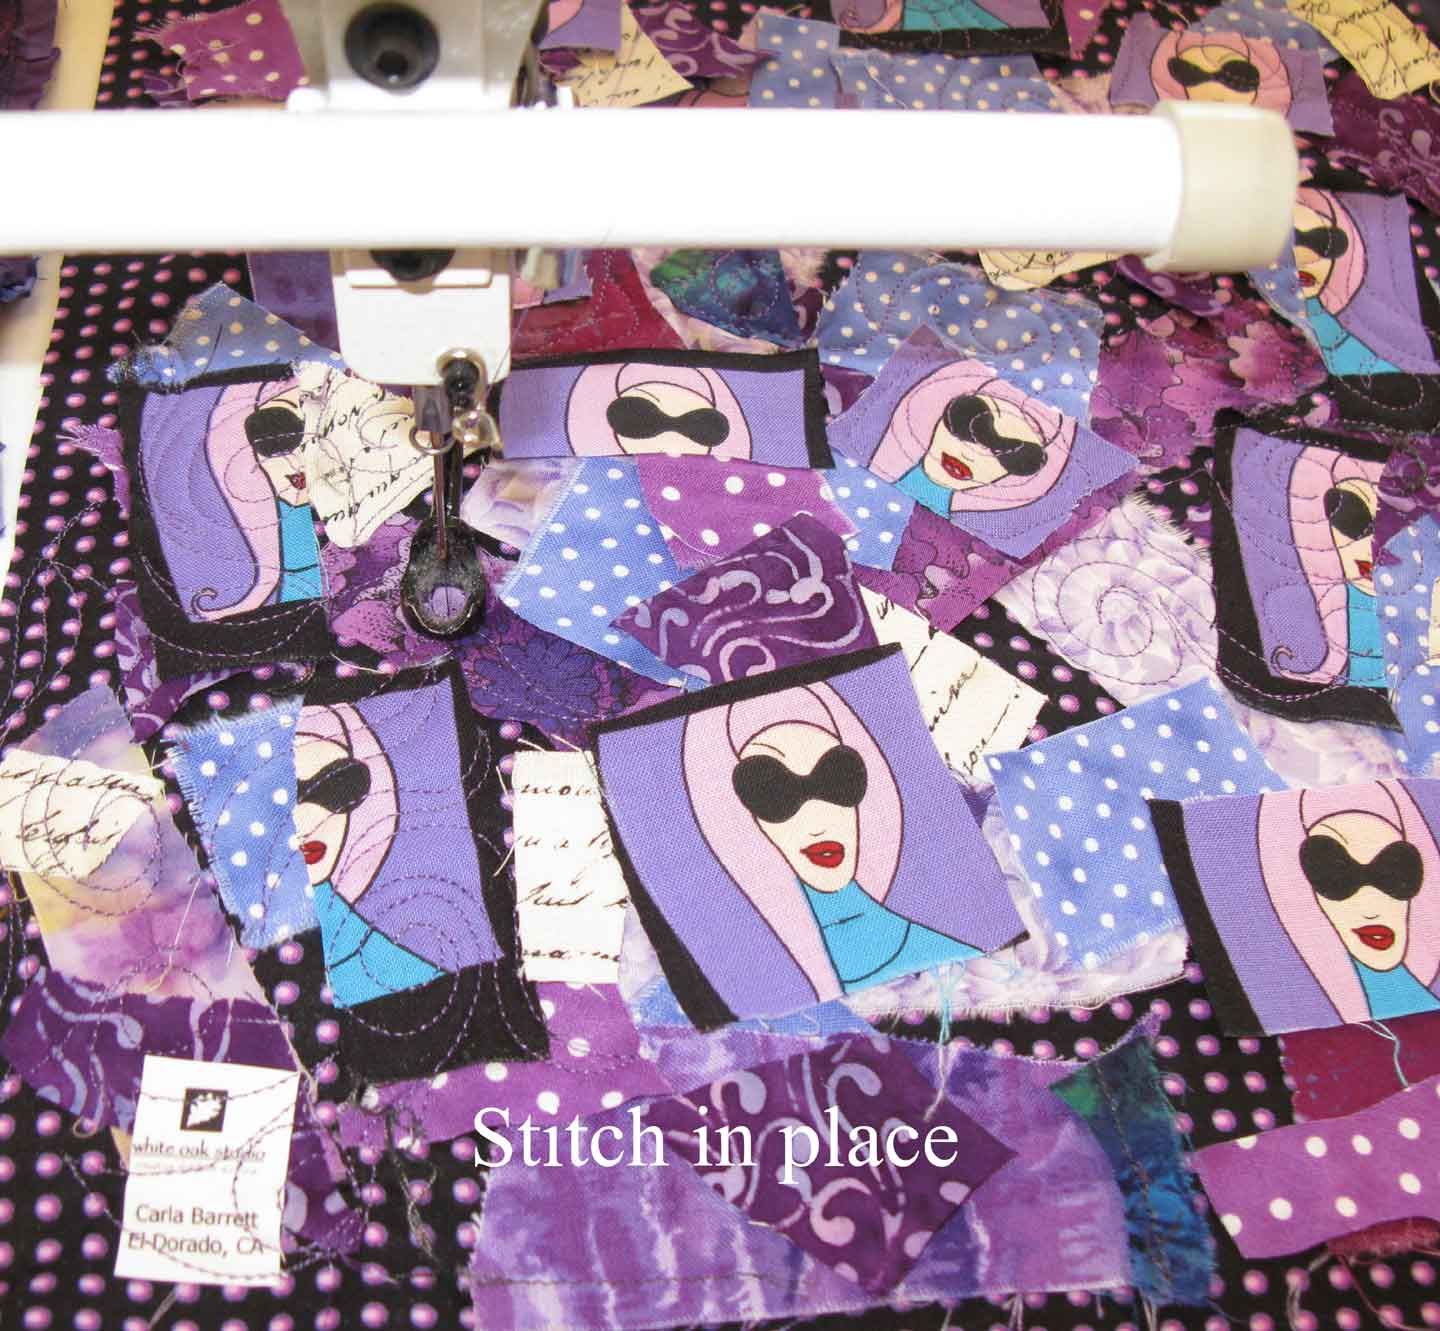

[For mid and longarmers, yes, you can fuse the layers while loaded if you are careful. Thus said, my sample above was created without fusing. Use your machine to stitch down all the collage and loose pieces. Then add stitching texture to your collage. Once again, it is easier to do this with your table and machine setup].
Step 5: Use your rotary cutter and ruler to cut the inchies into the desired size widths. This step is pretty self explaining no matter what machine you are using. You will have long strips at this point.


[mid and longarmers- simply unload your machine and take it to your cutting table. From here on out, you will be using your DSM or home sewing machine to complete these.]
Step 6: Satin stitch the edges on both the long sides of the strips using your home sewing machine. You can make this step go faster by completing this step “chain style.” (if your machine does not have a satin stitch, you can also use a very tight zig-zag stitch.)

Step 7: Cut these into your desired sizes back at your cutting table. Then take them over to your sewing machine to satin stitch the raw edges.


Step 8: Embellish!! This is a very fun last step! Use any embellishment or technique to complete your inchie. Don’t be shy! I have not shown you my final piece because I purposely want you to be creative and come up with your own way of embellishing these. Any technique is fair game!
*** Don’t forget to add your name to your piece. This can be done by taking a ultra fine permanent ink pen- such as the Micron- and signing the back, fusing your name to the back or attaching it via an eyelet and a tag. No rules, do it anyway you see fit!

——————————————————-
Q&A: I have my completed inchies… what can I do with them?
The ideas are endless, really. Frame them as a set and hang them on your wall. Add them to your quilt or fiber project as embellishments. Add an eyelet hole and make your own fiber necklace/bracelet. Add them to other projects.
If you are taking part in a group challenge, then mail them to your group coordinator. The coordinator will provide challenge details such as size, color, mailing details, etc.
HAVE FUN & CREATE!!!! I would love to see pictures of your finished inchies!
Carla Barrett- Feathered Fibers

What a great tutorial, Carla! Thanks for taking the time to post it. Hmmm….wonder if I can find some time to play….
Great tutorial Carla, thanks for it and organizing the swap. Hope you’re btter soon.
Great tutorial – you must be feeling better! I think I picked up a stomach bug from some little urchins that visited us last weekend.
Carla! As a non-quilter and a very practical seamstress (read sails and awnings with the occasional button and started seam) that looks fascinating, and I could probably adapt a lot of those techniques to my rather more primitive tech….though I’ll have access to a sewing machine in a week or so….
very cool!
Thanks.
Great tutorial, Carla! I hope you’re feeling better soon. Take care!
Thanks Carla. The tutorial is great.
Pingback: Make this: #11 « Isle B. Stitching
I’d never thought of using Fun Foam, thanks for the idea.
Pingback: Inchies and Other Mailings « Feathered Fibers
Pingback: Inchie Preview « Feathered Fibers
Pingback: Mini 1″ Quilt Tutorial / Quilting Gallery
Pingback: I’ve been busy: 1 « At Random
thanks for the tutorial. I am inspired and ready to join an Inchie swap.
These are so cute. Thanks for a great tutorial.
I was looking at what exactly inchies are and stumbled on your posting. Your take on them looks like such a fun process! Thank you for sharing.
great tutorial. Thank you.
This is great – I’m not a big quilter, but think this is something I can get in to as a starter. Can’t wait to give it a try. Thanks for the lesson.
Great tutorial! Very easy to follow.
Pingback: Fabric Scrap Tutorials « Feathered Fibers
Just discovered inchies. I can’t wait to play. Thanks for posting this tutorial!
Pingback: Inchie Bracelet… What Fun!
Thank you! I’m on my way to inchie land thanks to you!
When using the fun foam do you need to apply any
fuzing spray?
Jean, I am a strong proponent of using what works for you and using supplies on hand. If you already have some adhesive spray on hand, just double check that the chemical in the spray do not affect your fun foam.
Otherwise, I often will use a very thin fusible for my fun foam/fabric projects. Beware of thick fusibles, though, as they can gunk up your sewing machine. The brand I mention above when I wrote this was Steam-a-Seam lite 2; there are now more light weight fusibles on the market.
Thanks for posting! Have fun! Carla
Pingback: Antipodean Sunshine. « madebypatch
Hi Carla. Thank you for the tutorial. I have just received some inches from a friend in Australia and written about it on my blog. I have included a link to your tutorial – hope thats ok.
Hi Patch, you are very welcome! Have fun creating! Carla
I would like to enter an inchie swap. How do I find one
Hi Cathy, I would suggest you google and look on forums related to quilting or groups on Facebook and look for some swaps there. If you don’t see any, offer to organize them yourself. It is fun! Another good source would be a quilt guild group. I wish you all the best! Regards, Carla
Pingback: Fädchenfisch-Fundstück: Inchie-Tutorial – SewSimple.
Pingback: ¿Sabes lo que son los inchies? | Blog de Botonalia.com