
Thank you for the feedback regarding the eraser carving tutorial yesterday. In the early days of carving, the only material available was artist gum erasers- hence the term, “eraser carving.”
Yesterday, we covered where you can purchase your supplies online. If you are similar to me and you want it NOW- check out a local craft store like Joanns or Michaels in the printmaking section. The carving tools are actually lino (short for linoleum) blades or cutters. I recommend a variety of sizes: Liner (1),V-Gouge (2),Large Line (3),U-Gouge (4),Large Gouge (5), and a Knife (6).
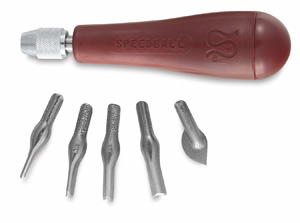
There are a variety of handles- I use an inexpensive Speedball lettering pen holder. I have also used the clunky handle shown in the photo above or an exacto knife.
Transferring the design to the printing block. I know of three ways to transfer your design:
Acetone Method The first way is to make a photocopy of the design (or laser printed from your computer), turn it over and apply acetone (fingernail polish remover) to the back of the paper with a soft cotton ball and rub gently. Be careful of words or other directional images as they will need to be backwards to stamp properly.
Tracing Paper Method Lay some tracing paper over your carving block, then your design and use a ball point pen or pencil to transfer.
Pencil Method This is the way I mainly do it. I draw with a #2 pencil onto a blank piece of paper and when I am happy with my design I will turn it over onto the block and run gently with my fingernail or the back of a spoon.

Then you carve around the outside line of the design using your finest carving tool:

Next, carve the inside with the finest blade, then switch to a larger “U” gouge to clean up around the image:

Use a stamp pad to determine high spots in your design:

Remove all areas that do not belong. Stamp it out to check your finished carved design:

You are finished! Now you are ready to do more detailed designs. Please share any carvings you complete. Sometimes I wonder if anyone actually tries out my tutorials! LOL
Regards, Carla

Now that’s just cool!
I love it, thank you for sharing. A HUGE Thank You for creating my new Blog it is fabulous….. hugs
I am going to have to try this….
Way cool! I’ll have to try that soon.
Carla, My bulldog is long gone, it was part of a series of things we printed from found items. We also made bowls and baskets out of several different kinds of materials. Then there was a collage section where we did regular and 3D sculpter type collages. That is about all I can remember from that class right now. It was college and that was 20 years ago now.
Chicken idea, bad college flash back memory of using the beer bong and the college party. My mind went wandering from your spin the bottle wino chicken. LOL
finally!
a fellow eraser carver! lol.
i carve a lot of my own stamps. usually from erasers I have lying around. I just carved myself a second set of alphabet stamps..you can see them on my blog 🙂